IPOP: SVPN
This is part 3 of the tutorial series: Previously..(with 24 soundtrack)
- IPoP was Installed.
- Alice and Bob registered on XMPP server.
- Alice and Bob are friends.
Social VPN

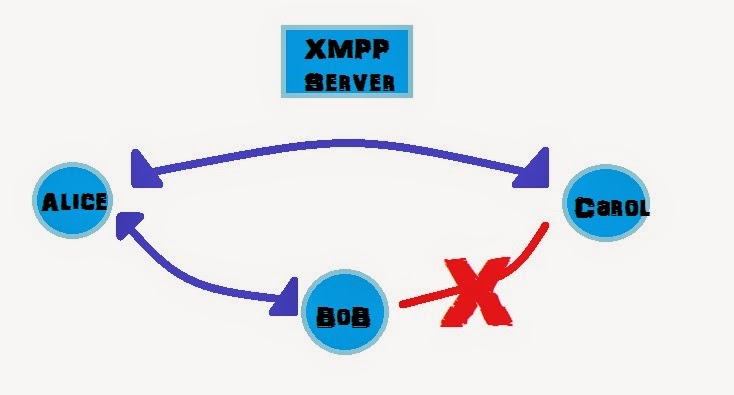
In this tutorial, I am going to connect Alice and Bob through IPoP’s SocialVPN controller. SocialVPN helps in creation of virtual private networks connecting an Internet users to their friend’s devices. It derives friend relationship from XMPP servers( That is why we added Alice and Bob as friends in the previous stage). Each user is in control of who their VPN connects to (for example Alice is friends with Bob and Carol, but Bob and Carol are not friends, in that case there will not be a VPN link between Bob and Carol).
Step 1: Creating configuration file
Well, my GSoC project will be related to this, IFFFFFFFF (thats a very big IF) I get selected (fingers crossed).
Alice and Bob create config.json file and store it in their respective IPOP directory (remember home/ipop-15.01.0_ubuntu14? If not, you can find it in my last blog)
The contents of Alice’s Config file will be as follows (xmpp_host depends on the server you used)
{
    "xmpp_username": "alice_sushant@xmpp.jp",
    "xmpp_password": "****(Yah, right!)",
    "xmpp_host": "xmpp.jp",
    "ip4": "172.31.0.100",
    "ip4_mask": 24,
    "stat_report": true,
    "tincan_logging": 0,
    "controller_logging": "DEBUG"
}
Similarily Bob’s config file (just change (username, password) , everything else stays the same(ip4,ip4_mask…))
Step 2: Running IPOP
Run this on both, Alice and Bob Start IPOP:
$ sudo sh -c './ipop-tincan-x86_64 1> out.log 2> err.log &'Note: use ipop-tincan-x86 in place of ipop-tincan-x86_64 for 32-bit Ubuntu machine.
then
Start SVPN controller:
./svpn_controller.py -c config.json &> log.txt &Step 3: Checking if connected
 Run (on Alice):
echo -e '\x02\x01{"m":"get_state"}' | netcat -q 1 -u 127.0.0.1 5800See the above image, if Bob did not start SVPN controller then his node won’t be visible.
But if started, then his node is visible but Offline
To bring him online, or to complete the connection, ping him
$ ping 172.31.0.101(wait for some time, when reply comes you can stop pinging with ctr+C)
Now run following again
$ echo -e '\x02\x01{"m":"get_state"}' | netcat -q 1 -u 127.0.0.1 5800If you are getting something like this..
 then congratulations you have successfully created a VPN.
You can see in the image that your IP is 172.31.0.100, and your peer’s IP is 172.31.0.101
Stopping VPN
To stop the vpn run:
$ pkill ipop-tincan-x86_64
$ ps aux | grep svpn_controller.py
$ kill <pid-of-svpn-controller.py>