IPOP: GVPN
Till now, we successfully connected two endpoints (Alice and Bob) over the internet using IPOP and SVPN controller.
But there are some disadvantages of SVPN, for example: What if there many many participants, it will be impractical for each node to add every other node as friend on the XMPP server.
Also, SVPN cannot be used directly for something like LAN gaming, this is because it employs network translation(to maintain friend relationships). This means for Bob Alice’s IP is different from Alice’s self IP. Or in other words the VPN is very personal and IP mapping is different for every person. To avoid this we are gonna use GroupVPN.

Step 1: Creating configuration file
This will be somewhat similar to config file from SVPN. But We are going to use ONLY ONE XMPP ID. This will solve our first problem (adding each node as friend).
For this task you can go through stage 2 and create a new XMPP jabber ID specifically for this purpose, or we can use Alice’s JID.
I created a new XMPP JID called ‘group_sushant@xmpp.jp’
Next create a config.json file in IPOP directory with the following contents for each of the participating nodes:
For Node 1
{
    "xmpp_username": "group_sushant@xmpp.jp",
    "xmpp_password": "****",
    "xmpp_host": "xmpp.jp",
    "ip4": "192.168.5.1",
    "ip4_mask": 24,
    "stat_report": true,
    "tincan_logging": 0,
    "controller_logging": "DEBUG"
}
For Node 2, same config file but {"ip4":"192.168.5.2"}.
For Node 3, same config file but {"ip4":"192.168.5.3"}.
and so on.
Remember, XMPP ID and Password should stay the same across all nodes.
Step 2 : Running IPoP
Run this on all the participating nodes
$ sudo sh -c './ipop-tincan-x86_64 1> out.log 2> err.log &'Note: use ipop-tincan-x86 in place of ipop-tincan-x86_64 for 32-bit Ubuntu machine.
then
./gvpn_controller.py -c config.json &> log.txt &Step 3: Check if connected
Run on any of the node to see the status of the network.
echo -e '\x02\x01{"m":"get_state"}' | netcat -q 1 -u 127.0.0.1 5800If any of the nodes did not start GVPN controller than those nodes won’t be visible. But if they start, then their nodes are visible but ‘Offline’
To bring them online, or to complete the connection run
$ ping 192.168.5.2 <ip of that node>(wait for some time, when reply comes you can stop pinging with ctr+C)
Now run the following again.
echo -e '\x02\x01{"m":"get_state"}' | netcat -q 1 -u 127.0.0.1 5800If you are getting something like this
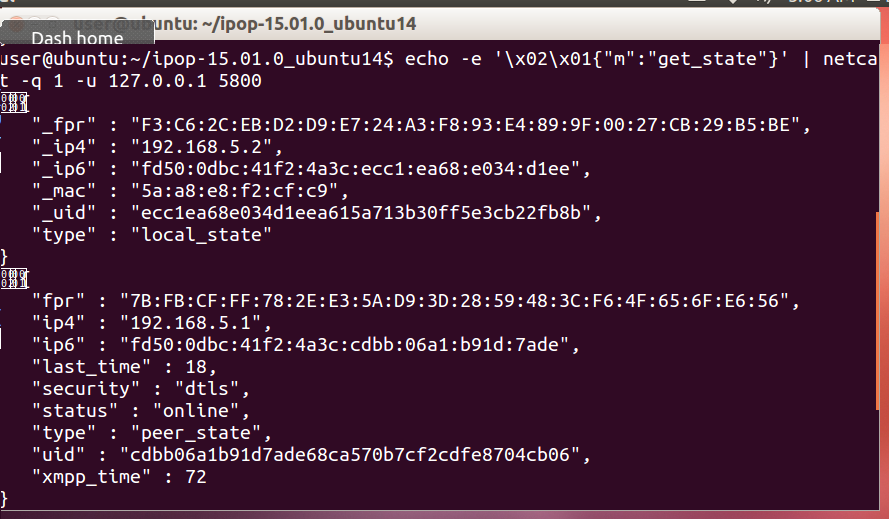 then congratulations you have successfully created a GroupVPN.
You can see in the image that your IP is 192.168.5.2, and your peers IP is 192.168.5.1,( which in the case of SVPN , your IP was always 172.31.0.100)
Step 4: How to avoid pinging step
IPOP doesn’t establish links right away, it checks whether that link is required (or someone is trying to communicate through that link). That’s why when we ping, a link is established , and the node appears online. This is very important in case of grid computers or clusters, where if a node is not required , the system should avoid the complexity of considering that node everytime.
But for applications like LAN gaming we don’t expect many nodes, therefore we can instruct IPOP to form the links right away, without us having to ping each link everytime.
To do this, its very simple just include the following in the configuration file:
{
  "on-demand_connection" : false
}
Stopping VPN
$ pkill ipop-tincan-x86_64
$ ps aux | grep gvpn_controller.py
$ kill <pid-of-gvpn-controller.py>